 Editorify
How to customize how your reviews look
On this page
You change how your reviews look in the design settings of the Editorify dashboard: star colour and size, rating text colour, list or grid layout, grid image size, the section title, the stars rating text, the write-a-review button and widget texts. They apply on Shopify, Wix, WooCommerce and BigCommerce. Full design customisation comes with the Premium, Gold and Diamond plans.
Where the design settings are
Log in to the Editorify dashboard.
In the side menu, open the design settings page. Depending on your dashboard version it is called Design Settings, Review Design Settings or Display Settings.
The page is split into sections you can expand: Display Settings, Reviews Design, Stars Design, Advanced Settings and Customize text.
After a change, click Save. Newer versions of the dashboard save automatically and show a green "Saved" message.
Each section below covers one setting.
Star colour and size
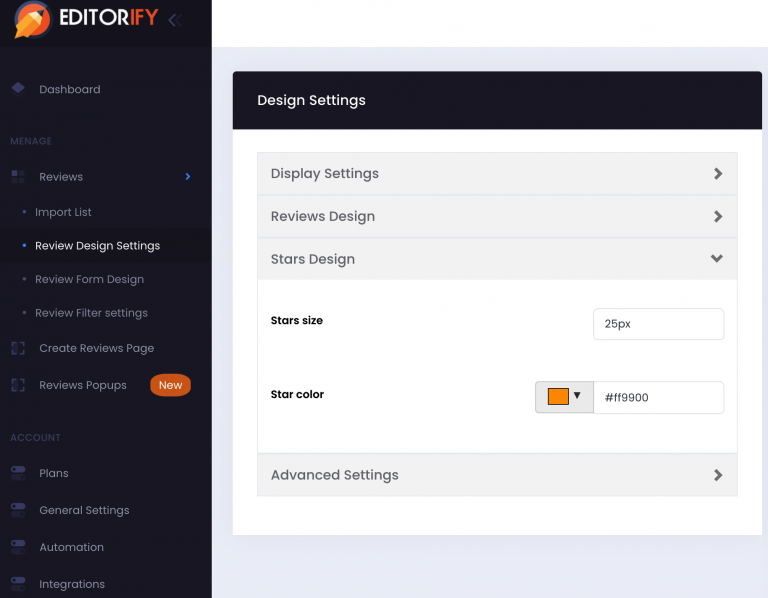
Open the design settings and expand Stars Design.
Set Stars size (in pixels, for example 25px).
Pick a Star color with the colour picker, or type a hex code such as #ff9900.
Save your changes.
Rating text colour
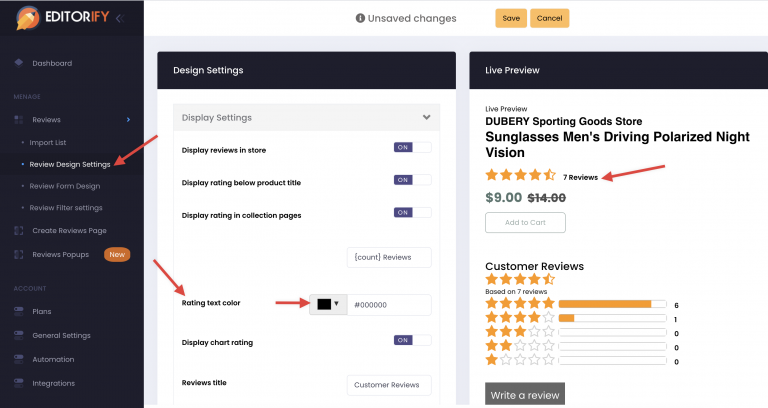
Open the design settings.
Scroll to Rating text color and choose the colour you want.
Save your changes.
Display style: list or grid
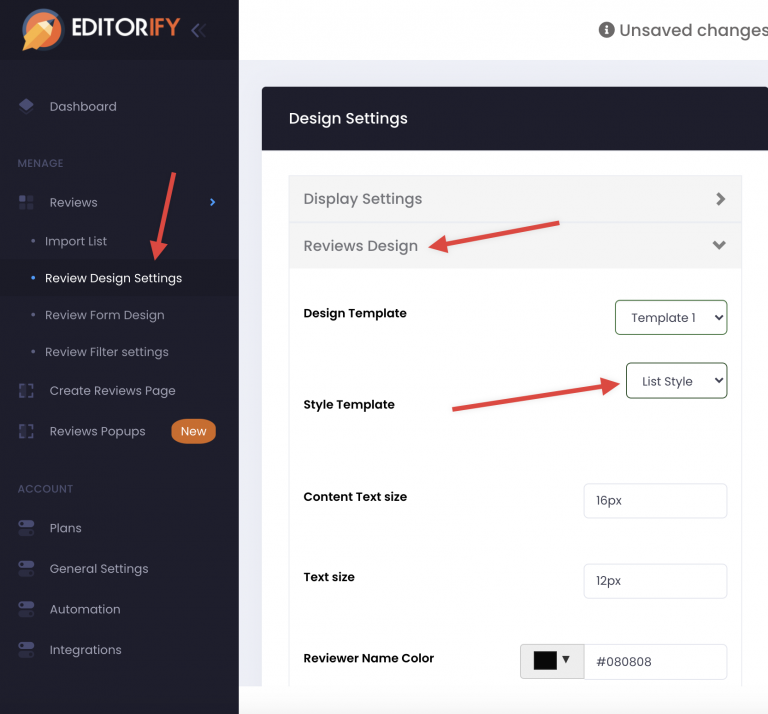
Open the design settings and expand Reviews Design.
Change the style template by choosing List view or Grid view.
Save your changes.
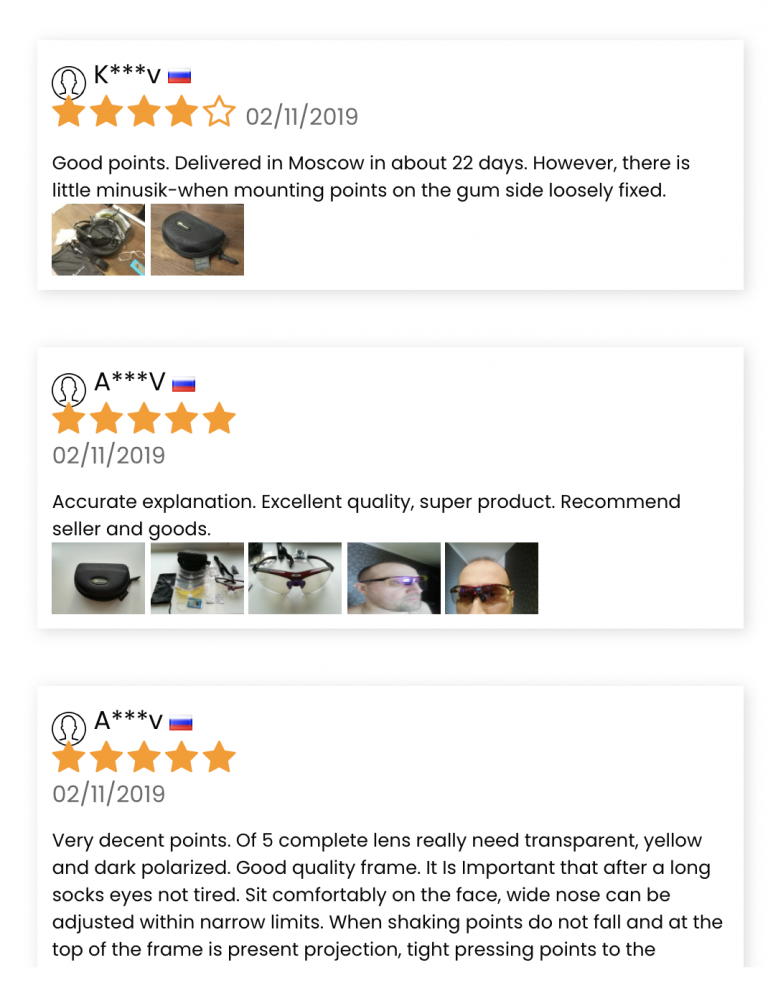
List view shows reviews one under another:
Grid view shows reviews as cards side by side:

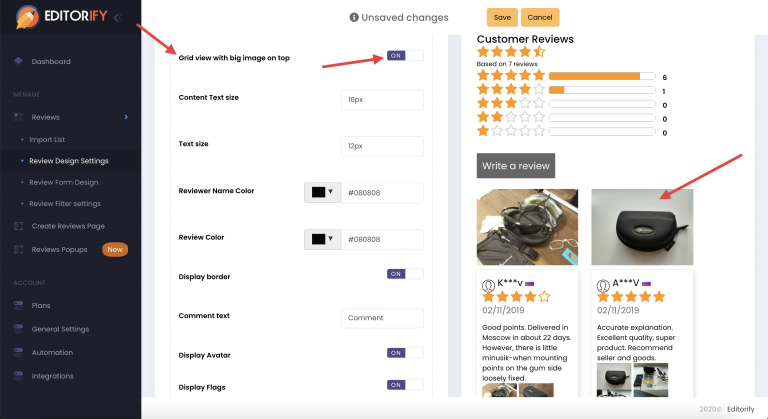
Image size in grid view
Open the design settings and expand Reviews Design.
Set the Grid view with big images on top option the way you prefer.
Save your changes.
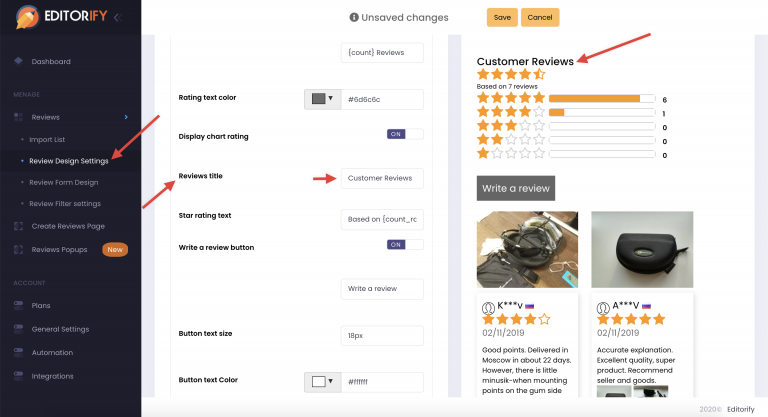
Reviews section title
Open the design settings.
Change the Reviews Title field, for example "Customer Reviews".
Save your changes.
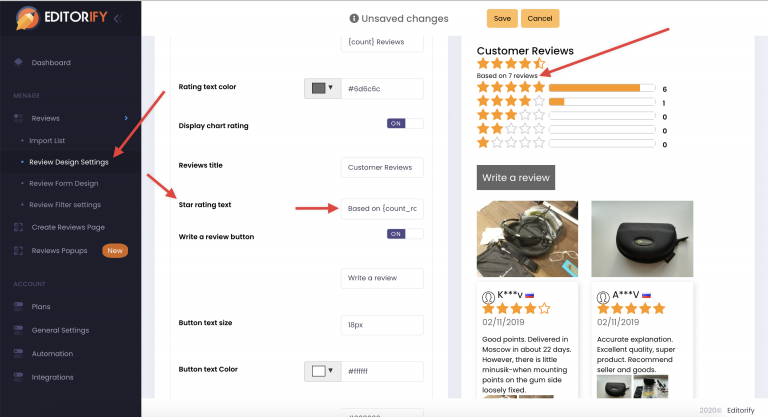
Stars rating text
This is the text shown next to the stars, such as "{count} Reviews".
Open the design settings.
Change the Stars rating text field.
Save your changes.
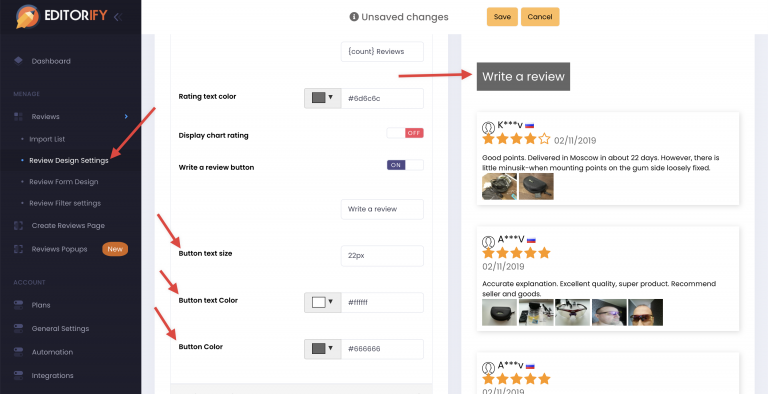
Write-a-review button design
Open the design settings.
Change the button's text size, text color and button color.
Save your changes.
To show or hide the button itself, see How to turn review widgets on or off.
Translate the widget's texts
Every text shoppers see can be rewritten in your store's language.
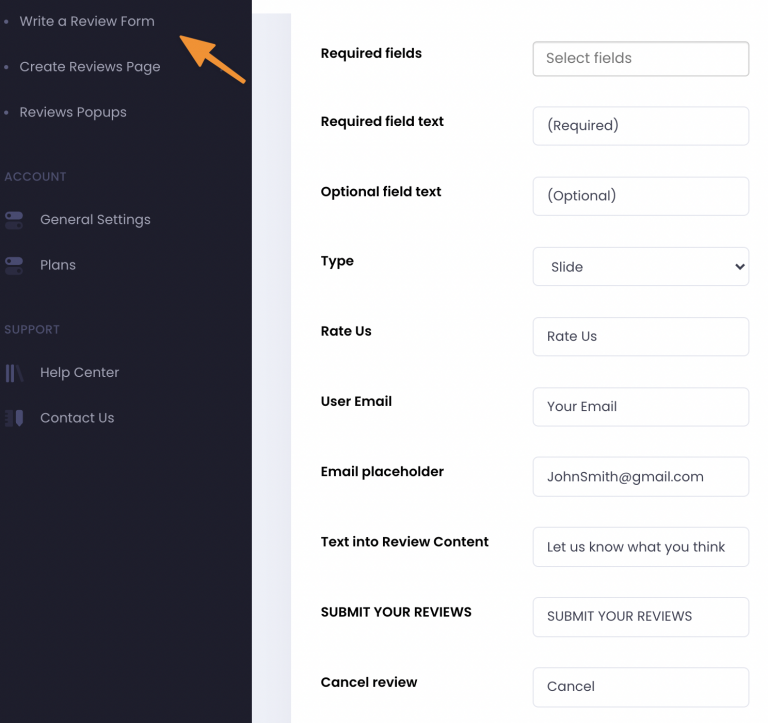
To translate the write-a-review form, open Write a Review Form in the side menu and replace each field label with the wording in your language.
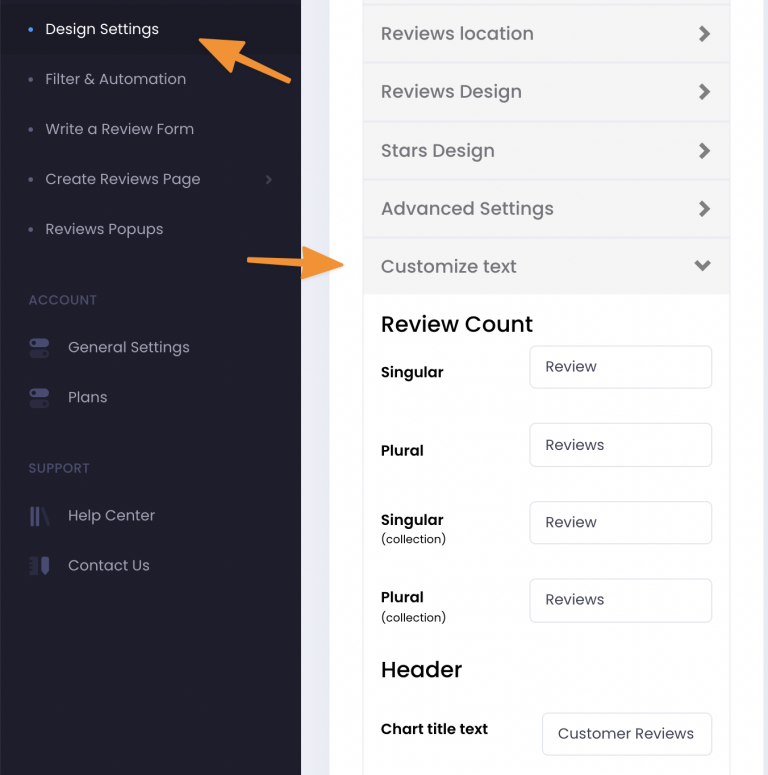
To translate the star rating texts on the product page and the collection page, open the design settings and expand Customize text. It holds the review count words (singular and plural, for product and collection pages) and the header texts, such as the chart title.
Save your changes.
Related guides
How to control the order of reviews on your storefront (sorting and reviews per page)
How to customize Editorify placement using theme blocks (Shopify)
Still stuck? Contact support or email support@editorify.com.